3D-Printed Storycubes
One of my kids needed storycubes for her homework and her teacher provided them with instructions how to cut and glue paper-cubes. But since we have already arrived at the 21st century we 3D printed them instead :-)
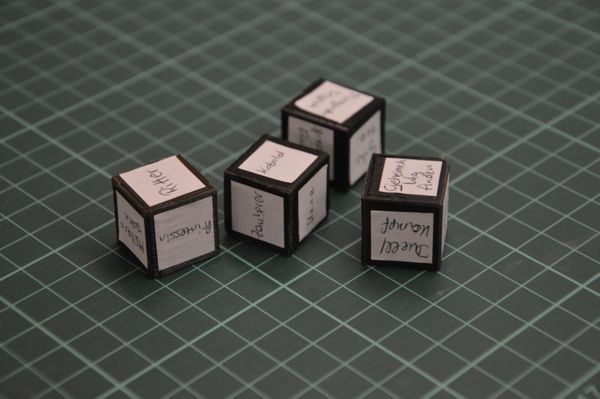
if you are interested in making your own the openscad code I used to generate the cube mesh is
translate( [0,0,10] ) {
    cube( 20, center=true );
}
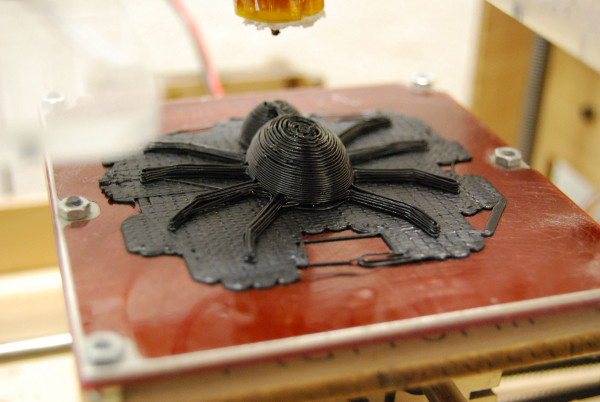
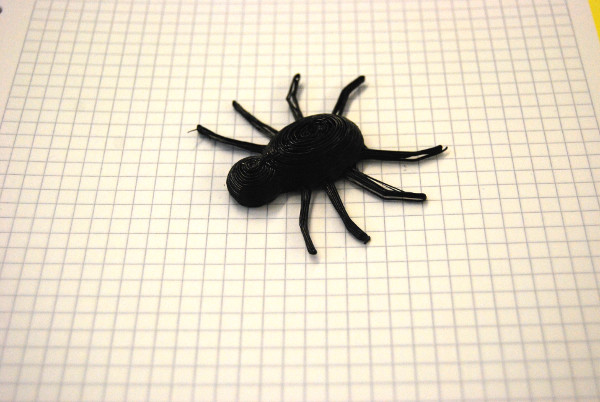
3D printed spider
I printed a little spider on my makerbot for our new office-jungle
you can download the blender file here
or the stl file here
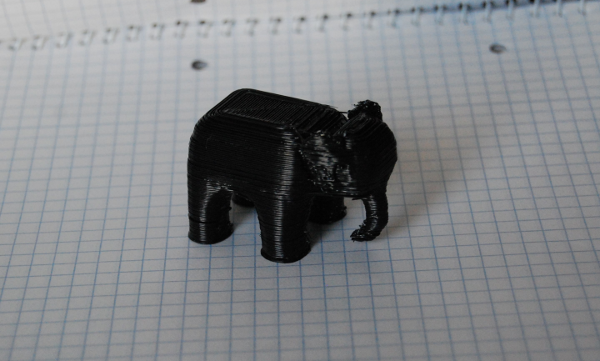
3D printed elephant
I made a little elephant in blender and printed it on my makerbot
this is my day 17 project for 30daysofcreativity
you can download the blend file here or you can download the stl file here
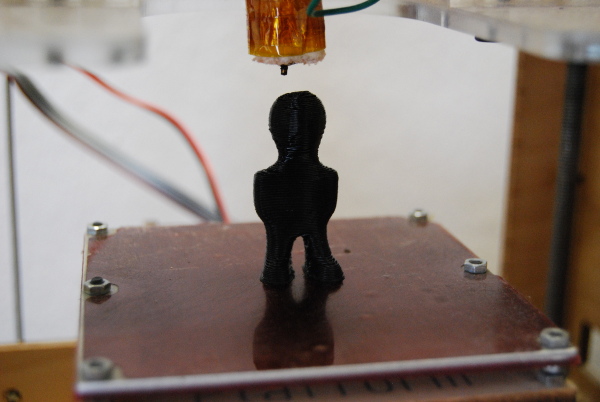
little 3D figure
I made a little figure and printed it on my makerbot. This isn't very exciting news for the world but it is for me, since it's the first thing my makerbot has printed for 3 months. I finally found the time to disassamble the extruder clean it an put it together again.
I also found that I had to change the extrusion temperature to 230C instead of 220C - no idea why but now it works
so here is my little figure - you can download the blend file here or the stl file here
this is my day8 project for 30daysofcreativity
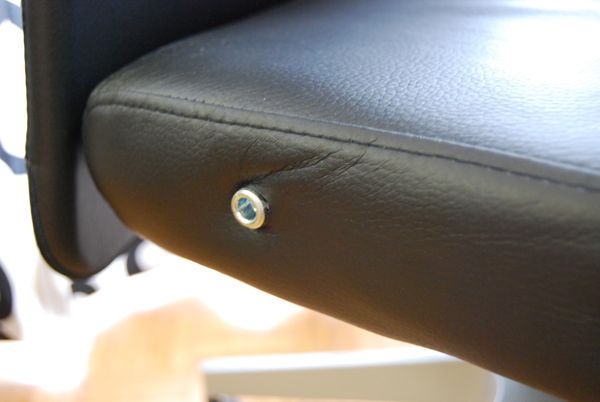
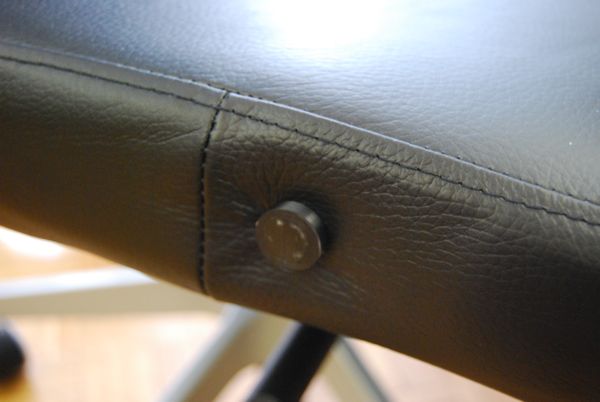
hiding some screws on my Chair
I got a new chair from ikea which came with armrests. I didn't want to screw them on the chair, because I generally don't like arm-rests on my chairs and they don't fit under my desk. Not mounting the arm-rests left some blank nuts which didn't look very pretty.
3D-printer to the rescue - I printed some caps to hide the nuts
You can download the scad file or the stl file If you need an example or happen to have the same chair
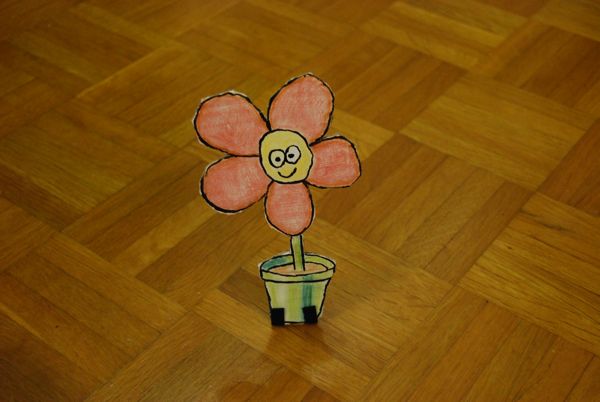
a happy cardboard flower
I just printed some more feet for cardboard figures, because I needed one for a happy flower I made for my wife
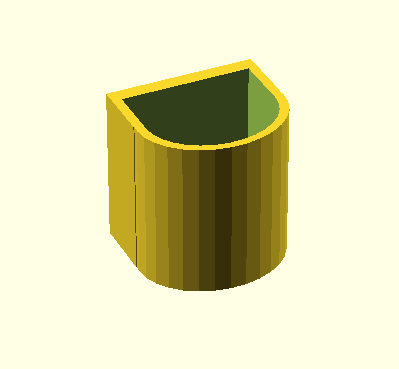
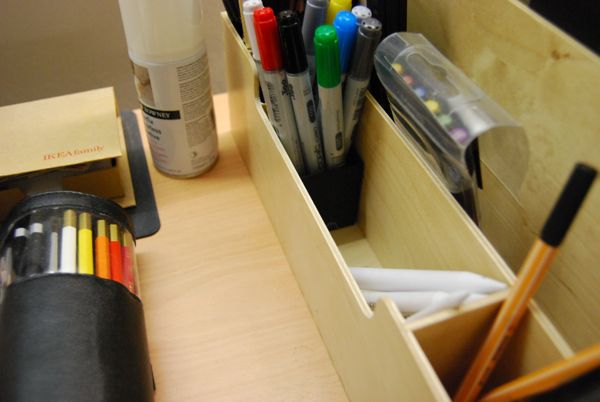
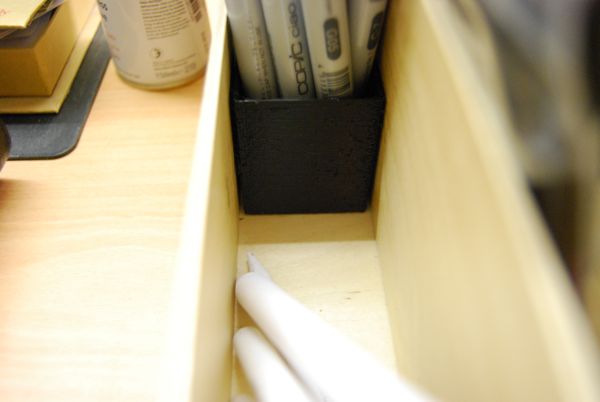
personalizing an Ikea pen holder with an 3D-Printer
I own a Ikea-pen holder on my desk which I like very much, but It has one very large compartment in the front, where I wanted to put my markers. Since I don't have enough markers to fill the whole compartment, I designed a small box in openscad and printed it on my makerbot - et voila! a smaller compartment for my pens.
The box is for sure not the biggest innovation in 3D desgin and I could have used cardboard boxes too, but I really like the idea using a 3D printer to personalize off the shelf furniture :-)
If you like to print your own you can download the openscad-source or download the stl-file
3D-Printed Unicorn (with Rainbow)
I designed a unicorn for my 3D-Printer using blender. This is my Day6 project for 30daysOfCreativity
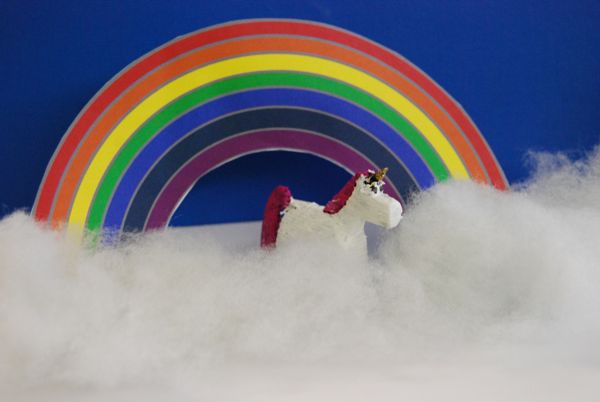
you can download the blender file or the stl file
read more ...3D-Printed Wizzard
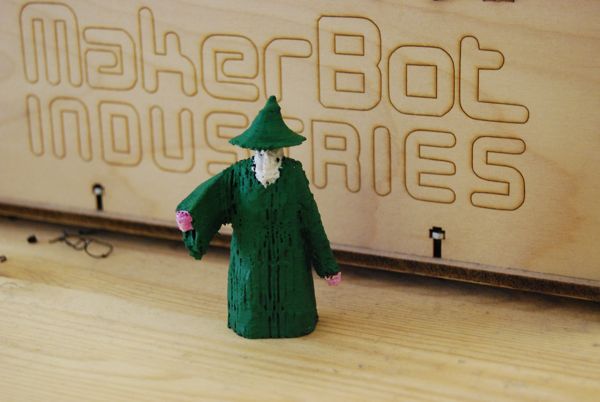
While browsing through thingiverse I noticed a huge number of draggons but a serious lack of wizzards. So I started the new blender 2.5 and moddled one.
The blender 2.5 GUI is a really huge improvement over the 2.4-Versions - absolutely thumbs up for this :-)
you can download the blend file or you can download the stl file if you want to print it yourself.
Then I tried to print something using the support material option of skeinforge for the first time. The support-material can be activated in the "Raft" Section of the skeinforge settings. Make sure you set "Support Inset over Perimeter Extrusion With (ratio)" to some negative value - I used -3 - or else your support material will stick to your model.
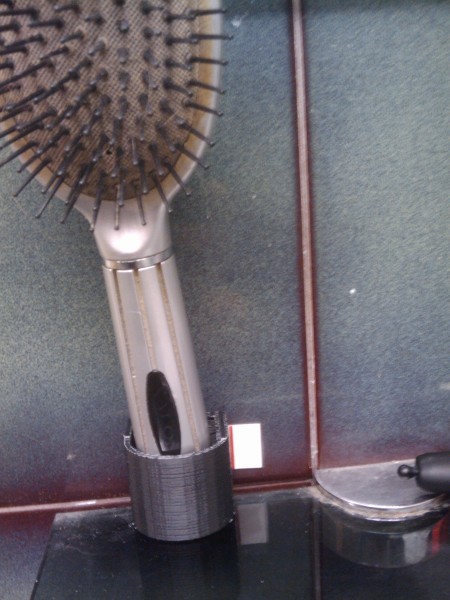
read more ...3D-Printed Brush-Holder
Bathroom-real-estate is a very limited resource in our flat, so I designed a brush-holder that can be glued to the wall and printed it on my makerbot.
I really like how a 3D-printer helps from getting "would be nice if .." into "cool - lets try it"
you can download the brushholder openscad source or the exported brushholder stl