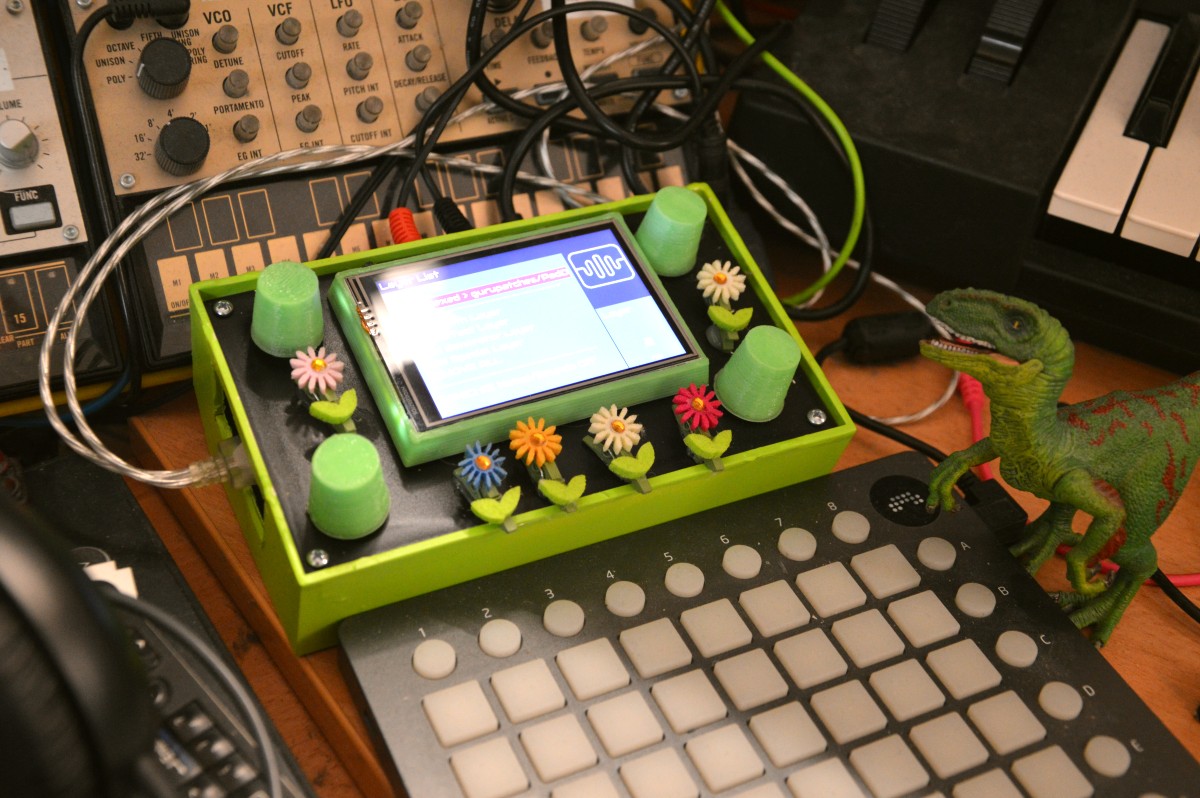
DIY Zynthian flower housing
I finished my final version of the Zynthian housing! I went for a spring-theme and spraypainted the housing in green and the lid black to give it a little bit of contrast. And since I start to get wired ideas from all the home office, pandemic isolation, video conferences, and whatnot I also added little flowers. Because why not :-)
The hardware is done now - onward to the software adventures! I already started playing with the sample packs that are part of the zynthian project and the dexed lv2 synth - but i still have "adding pd and supercollider patches" on my my todo list.
I also plan to record a video and post some sound demos on soundcloud soon.
read more ...DIY Zynthian housing prototype part II
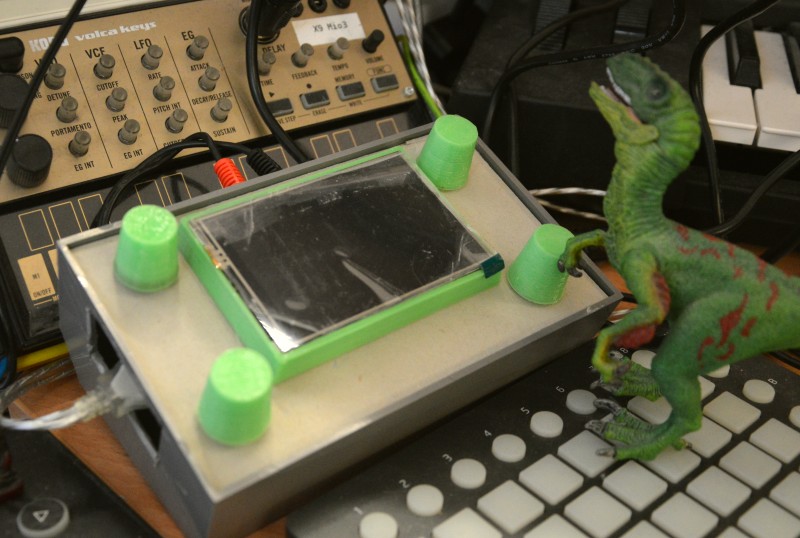
I created a new cardboard prototype for my zynthian. This time dino is much more satisfied with the button placement and he also likes the color of the buttons and the bezel :-)
I think this will be the version I drill into the metal front of the housing. Now I need to think about the artwork and a custom color theme for the software to match my buttons
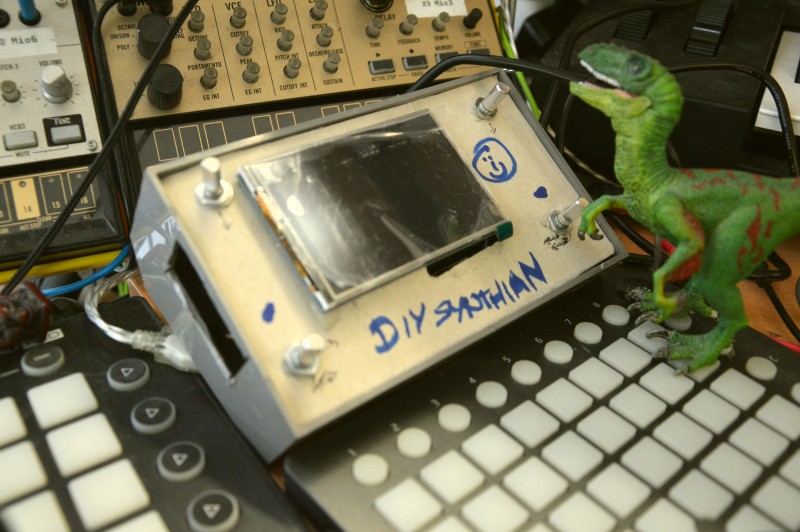
DIY Zynthian housing prototype
I started creating a housing for my diy zynthian - the front panel is currently made of cardboard to allow me to experiment a little bit with the placement of the various components. Dino isn't yet 100% satisfied with the placement of the rotary encoders and I think I will need to 3D print a bezel for my display.
also the artwork on the frontpanel needs to be reworked a little bit :-)
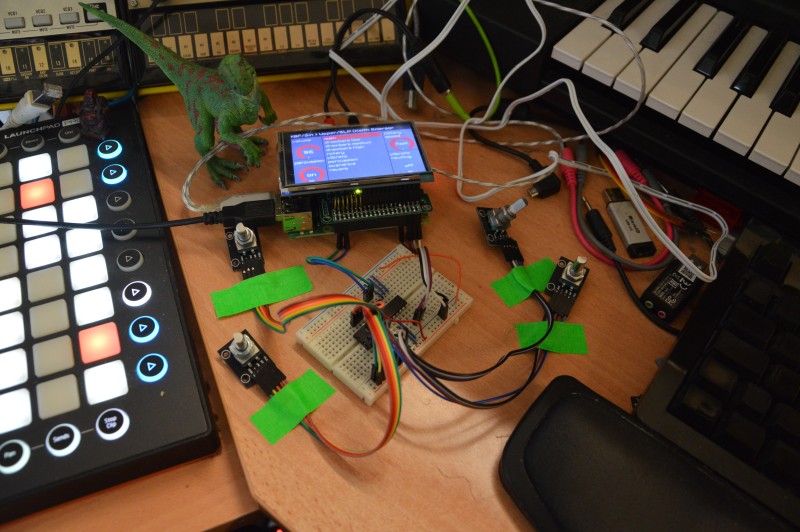
DIY Zynthian Prototype
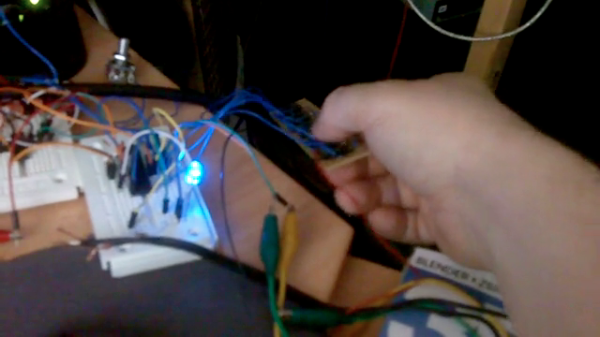
I started experimmenting with the Zynthian linux image for a spare Raspberry PI and a touch screen shield that have been sitting unused in my spares drawer. Now I finally managed to get some rotary encoders and a MCP1723 I2C IO-Expander. After some experimenting, sweating, swearing, more experimenting and finally replacing a broken pi I managed to get them running and now I have a super cool first working prototype of my DIY Zynthian
Now I need to create a more permanent solution for my mpc1723 circuit and a proper housing for the whole thing :-)
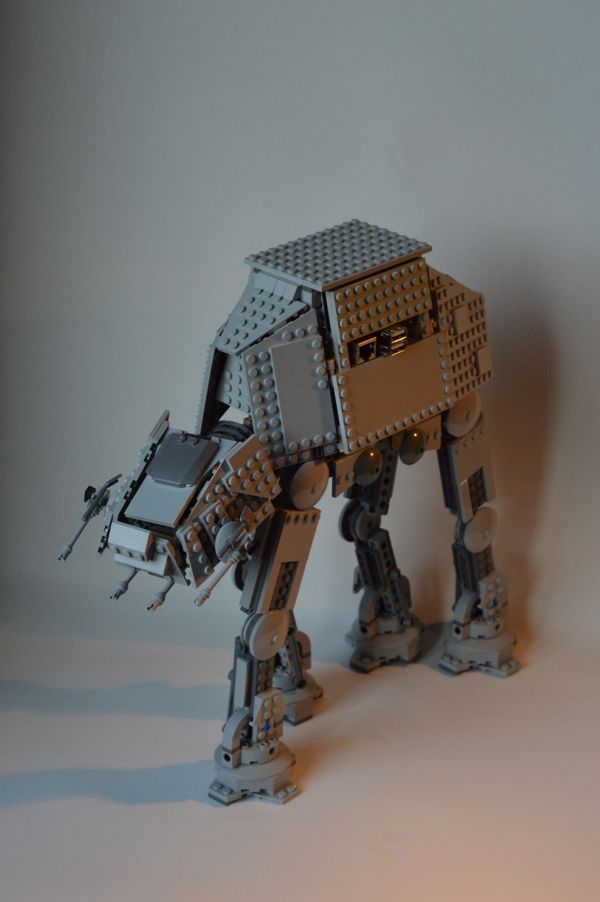
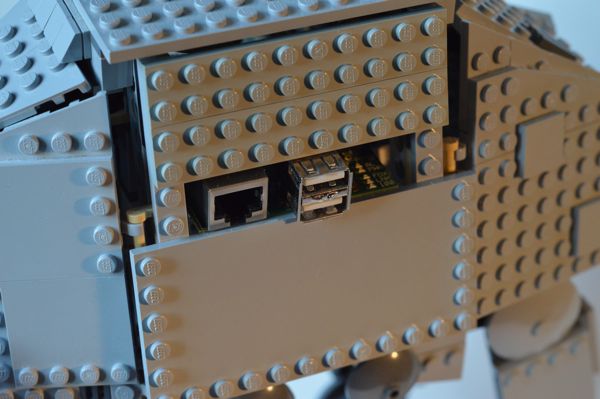
Lego AT-AT-Walker Raspberry PI case
I modified my LEGO AT-AT walker model a bit and removed the storm-troopers that where sitting inside (who are obviously very incompetent, because they can't even make the walker stand up again after it drops to its knees) and made replaced them with a Raspberry PI.
Now I have an AT-AT-Walker Raspberry PI Lego case - Very awesome :-)
RadioPI - debugging
When it comes to DIY projects one rule that ALLWAYS applies is that it takes longer than originally planned :-/
I´m currently debugging the radio module for my raspberry pi based retro-car-radio project and I realized that debugging software is far easier that debugging a hardware module. I already found out that it´s a stupid idea to shorten some of the coppertraces by making the circuit board touch the metal housing of the radio and I forgot to solder in a resistor.
I also found out that it´s a bad idea to accidentally remove some of the smd parts of a raspberry pi (RIP) and that the sd card holder of a pi is not very stable :-/
currently I´m trying to find a replacement part for a broken variable resistor - but theeeeeen .... nearly there, really, this time for sure, what could possible go wrong?
Stay tuned :-)
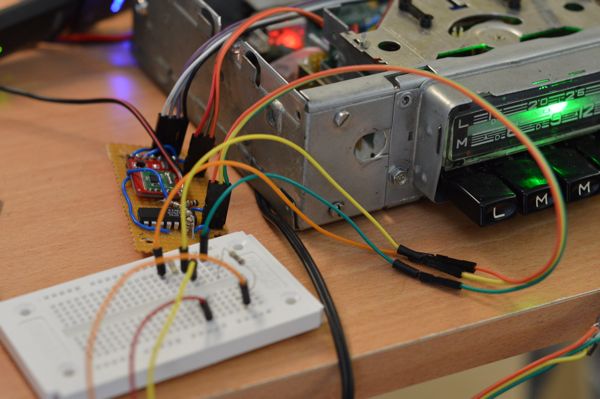
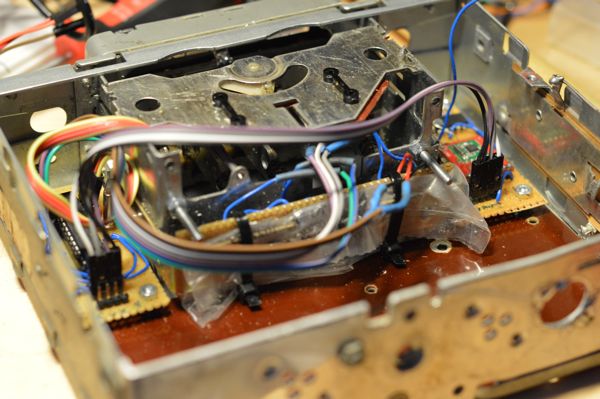
RadioPI hardware part 1
Yesterday I started mounting the components for my raspberry pi based retro car radio into the housing of the blaupunkt radio from the 60ties.
And I learned a lot - the hard way :-)
- For example that USB cables need an astonishing amount of space - even when folded and tied down with cable binders.
- USB-connectors are really, really, REALLY large - even if they are called micro usb.
- Drilling holes into ferromagnetical materials is a bad idea when you have two small speakers and a magnetic screwdriver laying on your desk - even it looks very funny
So there will be a unplanned part2 of the hardware session after I found shorter USB cables preferably with smaller connectors :-/
RadioPI - finalizing the audio module
Today I soldered the radio module for my rapsberry pi based car radio. This was the last soldering/electronic challenge for this project now I only need to finish the software (= easy) and the hardware problems (= somewhat outside of my comfort zone :-))
The audio board consists of a AR1010 breakout board from sparkfun that connects via i2c and a simple preamplifier for the radio signal. The 3 connector on the right side go to the analog audio out of the raspberry pi.

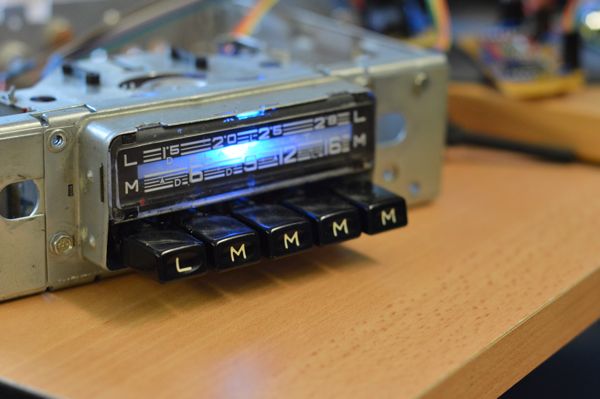
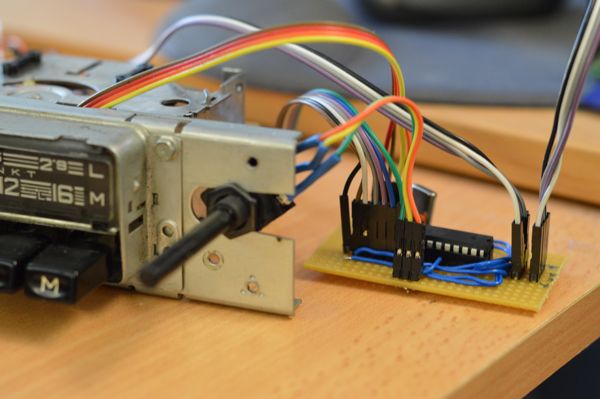
Day 30 of 30DaysOfCreativity - RadioPI interface module
Today I finished the interface module for my raspberry pi based retro car radio. The module interfaces the buttons, the variable resistor and a RGB-led using an ATMega 328p running an arduino firmware.
This is my day 30 project for 30daysOfCreativity but I think I will need to extend my 30 days a bit so I can finish this project :-)
Day 28 of 30daysofcreativity - testing the radiopi software
today I started to write and test the software for my raspberry pi and arduino based retro car radio. Here is a short video that shows how the switching of the stations works. There are 4 slots for the stations the 5th slot turns on the airplay mode