
Generating 3D Objects from Heightfields
Back in the old days, when I was a basic hacking teenager, the state of the art technique for getting awsome 3D Graphics on the atari-screen was rendering triangles based on a grayscale bitmap - aka heightfield.
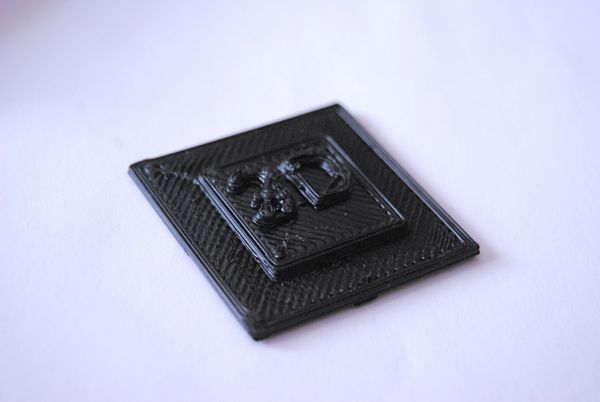
I reanimated this knowledge to generate a 3D object from such a heightfield. so in fact this blog article shows how to take something like this
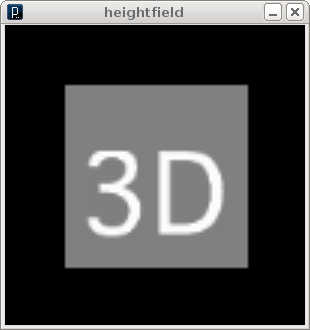
and turn it into something like this.
To generate the stl file run the processing sketch below. It switches between the 2D and 3D view on every keypress. When 'e' is pressed the stl file is exported.
the exported file can be imported into blender
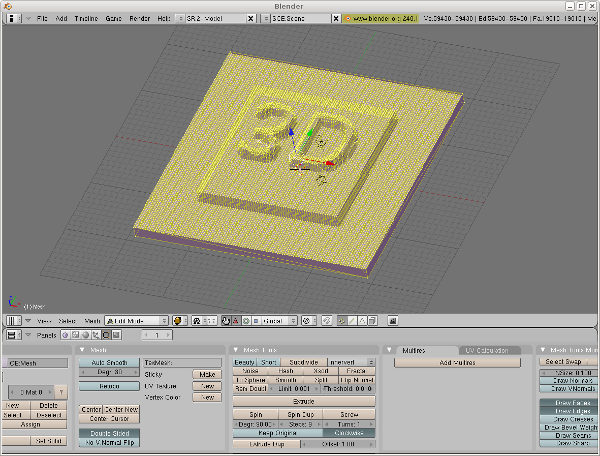
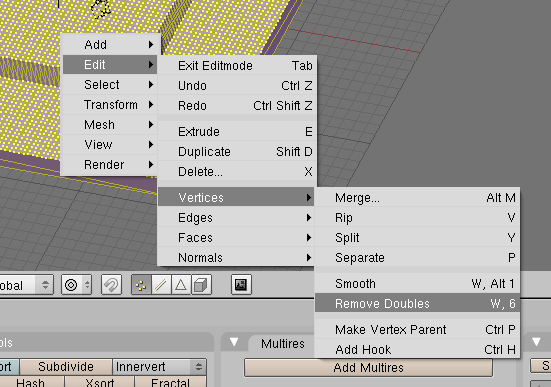
scale and rotate it to the desired size. Then go to the editmode (TAB) and select all the vertices ('a'). Select "remove doubles" from the edit->vertex Menu to join overlapping vertices (or else skeinforge is realy, realy unhappy with the mesh)
Finally export the mesh as stl again, slice it with skeinforge and print it on the makerbot.
/**
generate a stl file from a heightfield<br/>
by <a href="https://www.local-guru.net/blog">Guru</a>
*/

import processing.opengl.*;
import unlekker.data.*;

PGraphics img;

void setup() {
  size(300,300,OPENGL );
  smooth();

  img = createGraphics( 100,100,P2D );
  img.beginDraw();
  img.background(0);
  img.stroke(130);
  img.fill(128);
  img.rect( 20, 20, 60, 60 );
  img.stroke(255);
  img.fill(255);
  PFont f = loadFont( "Geneva-48.vlw");
  img.textFont(f, 36);
  img.text("3D",25,70);
  img.endDraw();

}

float a = 0;
boolean imgmode = true;
boolean rot = true;

void draw() {
  background(0);
  if ( imgmode ) {
    image(img, 0,0, width, height );
  } else {
  lights();
  fill(128);
  stroke(128);
  noStroke();
  a += 0.01;
  pushMatrix();
  if (rot) translate( width/2, height/2 );
  if (rot) rotateX( PI/2 );
  if (rot) rotateZ(a);
  img.loadPixels();

  float h = 100;
  float l = 20;

  translate(0,0, -h + l );


  if ( !rot ) beginRaw("unlekker.data.STL","guru.stl");
  for( int x = 0; x < img.width; x++) {
     beginShape(TRIANGLE_STRIP);
     for( int y = 0; y < img.height; y++) {
       float h1 = map(brightness(img.pixels[ x+y*img.width]), 0,255, 0, l);
       float h2 = h1;
       if ( x < img.width - 1 ) {
           h2 = map(brightness(img.pixels[ x+1+y*img.width]), 0,255, 0, l);
       }
       vertex( map( x, 0, img.width, -100, 100), map( y, 0, img.height, -100, 100 ), 10 + h1);
       vertex( map( x+1, 0, img.width, -100, 100), map( y, 0, img.height, -100, 100 ), 10 + h2);
     }
    endShape();
  }

  beginShape(QUAD_STRIP);
  vertex(-100, -100, 0);
  vertex(-100, -100, 10);
  vertex(100, -100, 0);
  vertex(100,-100, 10);
  vertex(100, 100, 0);
  vertex(100, 100, 10);
  vertex(-100, 100, 0);
  vertex(-100, 100, 10);
  vertex(-100, -100, 0);
  vertex(-100, -100, 10);
  endShape();

  beginShape(TRIANGLE_STRIP);
  vertex(-100, -100, 0);
  vertex(100, -100, 0);
  vertex(-100, 100,0);
  vertex(100, 100, 0);

  endShape();

  if (!rot) endRaw();
  popMatrix();

  }
}

void keyPressed() {
  if (key == 'e') {
    noLoop();
    redraw();
    rot = false;
    a = 0;
    redraw();

  } else {
   imgmode = !imgmode;
   rot = true;
   loop();
  }
}


See also:
processing blender integration - a first test
hexagonal animated texture
growing texture
3D printed spider
Fantastic work!
I made some minor changes to allow image files as input:
http://davemenninger.blogspot.com/2010/04/fun-with-processing.html
Thanks so much. I can't wait to print something created by this script...