SLR controlling via computer
Today i managed to shoot photos and download them in one step using a little c++ programm. the camera must be set to the MTP/PTP-Mode for this to work. The programm below uses the libgphoto2-API to control the camera and send it a capture command followed by a download command. the library is realy nice to code with, but very badly documented.
read more ...Ascii-art robot
          ()               ()
            \             /
           __\___________/__
          /                 \
         /     ___    ___    \
         |    /   \  /   \   |
         |    |  H || H  |   |
         |    \___/  \___/   |
         |                   |
         |  \             /  |
         |   \___________/   |
         \                   /
          \_________________/
         _________|__|_______
       _|                    |_
      / |                    | \
     /  |            O O O   |  \
     |  |                    |  |
     |  |            O O O   |  |
     |  |                    |  |
     /  |                    |  \
    |  /|                    |\  |
     \| |                    | |/
        |____________________|
           |  |        |  |
           |__|        |__|
          / __ \      / __ \
          OO  OO      OO  OO
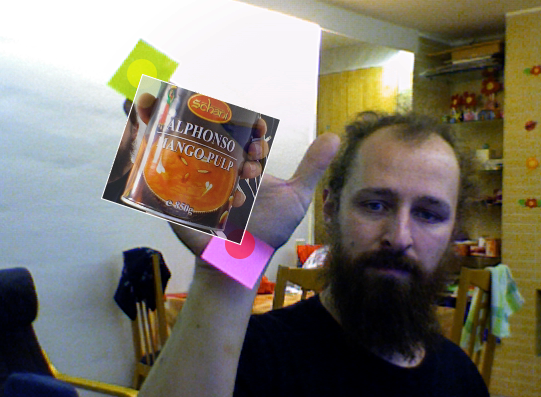
read more ...Touchless Multitouch in Processing
update (23.11.2008): i made a processing library out of the codeexample above - guru
Today i read about touchless an opensource sdk microsoft has released. it enables you to track objects using a simple webcam to create apps similar to a multitouch display.
then i spent about 20 minutes coding a processing sketch that does roughly the same :-)
as you can see in the screenshot i cant affort the same cool toys the microsoft coder has in the demo video, so i had to use some post-its instead
below is the complete sourcecode of the app. I didn't export it as an applet this time, because the applet couldn't use the quicktime api. It also only works on mac and windows this time, because processing uses the quicktime api. on linux the gstreamer based replacement from codeanticode can be used.
when the programm starts hold up 2 different colored items (use colors that do not appear in the background) then click on the first color with the left mousebutton and on the second color using the right mousebutton. and then enjoy the "minority report"-experience zooming and rotating the image :-)
import processing.video.*;
import java.util.*;

Capture video;
PImage img;

void setup() {
  size( 640, 480 );
  video = new Capture( this, width, height, 30 );
  img = loadImage( "mangoofdeath.jpg" );
  noStroke();
  smooth();
}

int searchColor1 = color( 128, 255, 0 );
int searchColor2 = color( 255, 0, 0 );

Point e1 = new Point( 0, 0 );
Point e2 = new Point( 640, 480);

boolean s1, s2;


void draw() {
  if ( video.available()) {
     video.read();
     pushMatrix();
     scale(-1,1);
     image( video, -width, 0, width, height );
     popMatrix();

     int idx = 0;

     ArrayList p1 = new ArrayList();
     ArrayList p2 = new ArrayList();
     for ( int y = 0; y < video.height ; y++ ) {
        for ( int x = video.width; x >0; x-- ) {
          if ( match( searchColor1, video.pixels[idx] )) {
            p1.add( new Point( x, y ));
            //fill( 255, 255, 0, 128 );
            //ellipse( x, y, 10, 10 );
          } else if (match( searchColor2, video.pixels[idx] )){
            p2.add( new Point( x, y ));
            //fill( 255, 0, 0, 128 );
            //ellipse( x, y, 10, 10 );
          }
          idx ++;
        }
     }

    noStroke();
    if (p1.size() > 0) e1 = avg( p1 );
    if (p2.size() > 0) e2 = avg( p2 );

    if (s1) {
      fill( 255, 255, 0, 128 );
      ellipse( e1.x, e1.y, 30, 30 );
    }
    if ( s2 ) {
      fill( 255, 0, 0, 128 );
      ellipse( e2.x, e2.y, 30, 30 );
    }

    if (s1 && s2 ) {
      pushMatrix();
      translate( e1.x, e1.y );
      int dx = e2.x - e1.x;
      int dy = e2.y - e1.y;
      rotate( - atan2( e2.x -  + e1.x, e2.y - e1.y) + atan2( img.width, img.height));
      float zoom = sqrt ( dx * dx + dy * dy ) /
           sqrt(img.width * img.width + img.height * img.height);
      scale(zoom, zoom );


      tint( 255, 200 );

      image( img, 0, 0 );
      strokeWeight( 3 );
      stroke( 255 );
      noFill();
      rect( 0,0,img.width, img.height );
      noTint();
      popMatrix();
    }
  }
}

boolean match( int c1, int c2 ) {
  int limit = 20;
   int sr = c1 >> 16 & 0xFF;
   int sg = c1 >> 8 & 0xFF;
   int sb = c1 & 0xFF;

   int cr = c2 >> 16 & 0xFF;
   int cg = c2 >> 8 & 0xFF;
   int cb = c2 & 0xFF;

   return cr > sr - limit && cr < sr + limit &&
     cg > sg - limit && cg < sg + limit &&
     cb > sb - limit && cb < sb + limit;
}

void mousePressed() {
  if (mouseButton == LEFT) {
      searchColor1 = get( mouseX, mouseY );
      s1 = true;
  }
  if (mouseButton == RIGHT) {
     searchColor2 = get( mouseX, mouseY );
     s2 = true;
  }
}

void keyPressed() {
  s1 = false;
  s2 = false;
}

Point avg( ArrayList l ) {
  if (l.size() == 0) {
    return new Point( 0, 0 );
  }
  int x = 0;
  int y = 0;
  for( Iterator i = l.iterator(); i.hasNext(); ) {
      Point p = (Point)i.next();
      x += p.x;
      y += p.y;
  }
  return new Point( x  / l.size(), y / l.size());
}

public class Point {
  int x;
  int y;

  Point( int x, int y ) {
    this.x = x;
    this.y = y;
  }
}
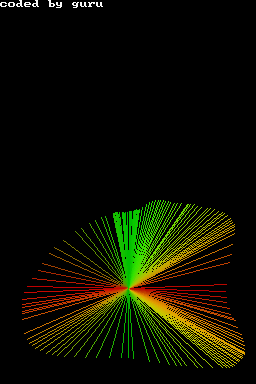
nds line-demo
Since my first demo for the Nintendo DS used the bresenham circle algorith, i had to write another starring its famouse brother - the bresenhaml line-algorithm. Which is a bit trickier than it seems when you first look at it. it took me 4 tries to make it work in all quadrants.
For those of you who don't own a nds i included a screenshot this time made using a emulator. imagine the upper part of the screenshot beeing displayed on the upper screen of the DS.
#include <nds.h>
#include <stdio.h>
#include <stdlib.h>
#include <unistd.h>

void setPixel( int x, int y, int color ) {
    VRAM_A[x + y * 256] = color;
}

void line( int x1, int y1, int x2, int y2, int c ) {
    bool swap = abs( y2 - y1 ) > abs ( x2 - x1 );
    int x1t =  swap ? y1 : x1;
    int y1t =  swap ? x1 : y1;
    int x2t =  swap ? y2 : x2;
    int y2t =  swap ? x2 : y2;

    int xs =  x1t < x2t ? x1t : x2t;
    int ys =  x1t < x2t ? y1t : y2t;
    int xt =  x1t < x2t ? x2t : x1t;
    int yt =  x1t < x2t ? y2t : y1t;

    int dx = xt - xs;
    int dy = abs(yt - ys);

    int dT = 2 * ( dy - dx );
    int dS = 2 * dy;
    int d = 2 * dy - dx;
    int x = xs;
    int y = ys;

    if ( swap )  {
        setPixel( y, x, c );
    } else {
        setPixel( x, y, c );
    }

    while ( x < xt ) {
        x++;
        if ( d < 0 ) {
            d = d + dS;
        } else {
            if ( ys < yt ) {
                y++;
            } else {
                y--;
            }
            d = d + dT;
        }
        if ( swap )  {
            setPixel( y, x, c );
        } else {
            setPixel( x, y, c );
        }
    }
}

int main(void) {
    touchPosition touch;
    // set lower screen to FB
    videoSetMode(MODE_FB0);
    vramSetBankA(VRAM_A_LCD);

    // set upper stcreen to textmode
    videoSetModeSub(MODE_0_2D | DISPLAY_BG0_ACTIVE);
    vramSetBankC(VRAM_C_SUB_BG);
    SUB_BG0_CR = BG_MAP_BASE(31);
    BG_PALETTE_SUB[255] = RGB15(31,31,31);
    consoleInitDefault((u16*)SCREEN_BASE_BLOCK_SUB(31), (u16*)CHAR_BASE_BLOCK_SUB(0), 16);

    iprintf("coded by guru
");
    // make sure main screen is on bottom
    lcdMainOnBottom();

    while(1) {
        scanKeys();

        if(keysHeld() & KEY_TOUCH) {
            touch=touchReadXY();
            line( 128, 96, touch.px, touch.py, RGB15(
                31 * abs(touch.px - 128) / 128,
                31 * abs(touch.py-96) / 96,
                0
            ));
        }

        // clear screen if key A is pressed
        if (keysHeld() & KEY_A) {
            for ( int y = 0; y < 192; y ++ ) {
                for ( int x = 0; x < 256; x ++ ) {
                    setPixel( x, y, 0);
                }
            }
        }
    }
    return 0;
}
javafx sdk on linux
I wanted to give the java fx sdk preview a try and got a bit confused, because there where no downloads for linux.
so i downloaded the macos version without netbeans (the zip file - not the dmg), unpacked it and set some environment variables (JAVAFX_HOME and JFX_HOME pointing to wherever you unpacked the zip file) - and TADA! A working javafx environment even under linux
if you write the code from below into a file called Hello.fx and compile it using
javafxc -d . Hello.fx
and run it using
javafx Hello
This should result in something like this 
import javafx.scene.*;
import javafx.scene.paint.*;
import javafx.scene.geometry.*;
import javafx.scene.text.*;
import javafx.scene.effect.*;
import javafx.scene.effect.light.*;

import javafx.ext.swing.*;

SwingFrame {
    title: "Hallo Welt"
    width: 310
    height: 98
    content: Canvas {
      content: Group {
        content: [
          Rectangle {
            x: 10
            y: 10
            width: 280
            height: 50
            arcWidth: 15
            arcHeight: 15
            fill: Color.web("#C0C0C0")
            effect: Lighting {
                light: DistantLight {
                    azimuth: 225
                }
            }
          },
          Text {
            x: 150
            y: 40
            content: "Hello World!"
            font: Font {
              name: "Serif"
              size: 20
              style: FontStyle.BOLD
            }
            fill: Color.WHITE
            horizontalAlignment: HorizontalAlignment.CENTER
          }
        ]
      }
    }
    visible: true
  }
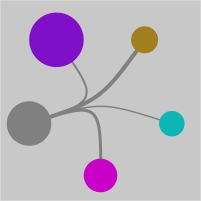
Voting trend visualisation
After every election, there is a poll resulting in a voter trend analysis. i always liked the graphs they made from the data on tv. This time i desided to make my own voter trend visualisation in processing.
i didn't know if i would be permitted to use actual data, so i used random() to generate it.
Downloadbots (digital version)
Some while ago i made downloadbots from a block of wood while waiting for a longer download.
i wanted to test the "noLoop()" function from processing, so i did a digital version of them
read more ...Shine a light
here is another little processing-sketch. this one is dedicated to everybody who wants to shine a litte light
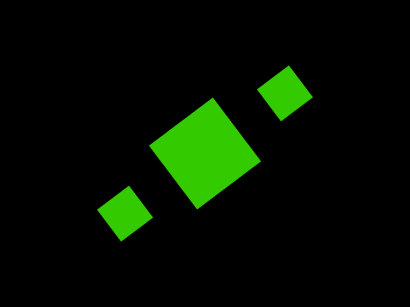
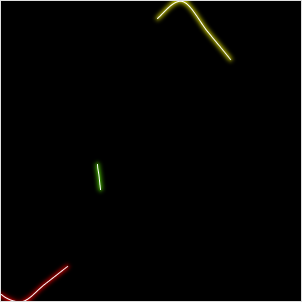
read more ...rotating box in openframeworks
I tried to write something simmilar to my neonbox-demo in openframeworks. At first a have been a bit puzzled because there is no rotate command.
Then i remembered that openframeworks uses OpenGL for drawing so glRotatef and glTranslatef can be used for rotating the image
    ...
int ang = 0;

void testApp::setup(){
    ofSetVerticalSync( true );
    ofSetFrameRate( 25 );
}

void testApp::draw(){
    int width = ofGetWidth() / 2;
    int height = ofGetHeight() / 2;

    ofBackground( 0,0,0 );
    glPushMatrix();
    glTranslatef( width, height, 0 );
    glRotatef( ang , 0, 0, 1);

    ang++;
    if (ang == 360) {
        ang = 0;
    }

    ofFill();
    ofSetColor( 255 * ( 1 + sin( ang * 2 * PI / 360 )) / 2,
        255 * ( 1 + sin( PI + ang * 2 * PI / 360 )) / 2, 0 );

    ofRect(  -300,  -50, 100, 100 );
    ofRect(  -100,  -100, 200, 200 );
    ofRect(  200,  -50, 100, 100 );


    glPopMatrix();
}
    ...
This time i also made a little screenshot for those who don't have openframeworks installed (yet :-) )