Day 28 of 30daysofcreativity - testing the radiopi software
today I started to write and test the software for my raspberry pi and arduino based retro car radio. Here is a short video that shows how the switching of the stations works. There are 4 slots for the stations the 5th slot turns on the airplay mode
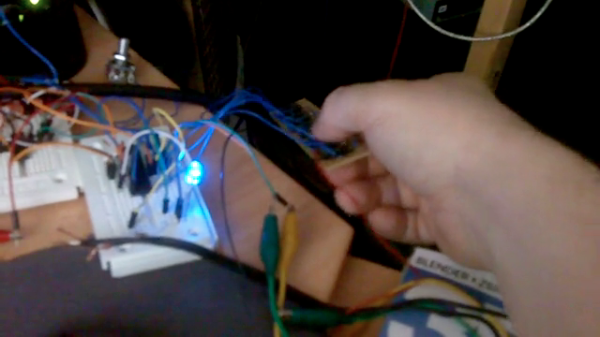
Day 27 of 30daysofcreativity - testing the amp module
Today I tested the amplifier module for the raspberry pi based radio. Now I need to write the software for controlling the radio using the buttons and create circuit boards for the modules that live currently on breadboards
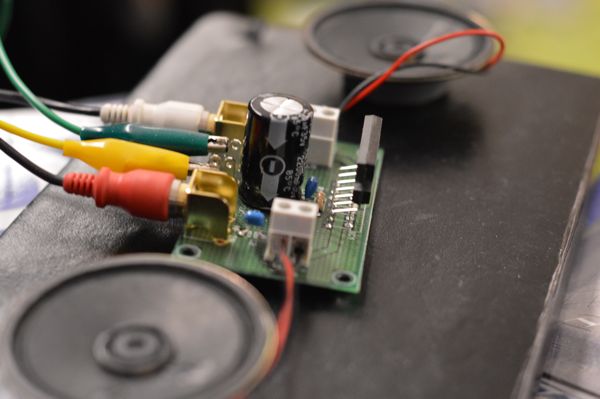
Day 26 of 30DaysOfCreativity - prototyping the controls
Today I hooked up the RGB led, the buttons and the potentionmeter to my breadboard arduino. I run the ATMega328P with a 20Mhz crystal and 3.3V which works pretty well. All my problems with I2C stability have disappeared now. The potentiometer is hooked to A0, the buttons are on D9 to D14 and the RGB led is connected to D6, D7 and D8. If the I2C master sends 1,2 or 3 the led color is changed, otherwise the slave sends the value of the potentiometer and the state of the buttons.
Day 25 of 30daysOfCreativity - a processing noisestar
My Day 25 project for 30daysofcreativity.com is a processing sketch that draws a star using the noise() method
click on the sketch to start it or to download the sourcecode

Day 24 of 30DaysOfCreativity - a breadboard arduino
Originally I planned to interface the hardware of the blaupunkt car radio from the 60ties using an attiny85 and an attiny2313 talking to the raspberry pi via i2c. But unfortunately this setup seems to be very unstable at the moment and I can´t get the i2c slaves to work properly. So I build a breadboard arduino today. I will try to hook the buttons, RGB-leds and the variable resistor and add a new i2c interface tomorrow.
So I have a Raspberry PI, an Arduino, some 3D printed parts, custom electronics, an interface to Apple iDevices, a retro car radio housing, .... hmmmmmmmm - Have I forgotten something?
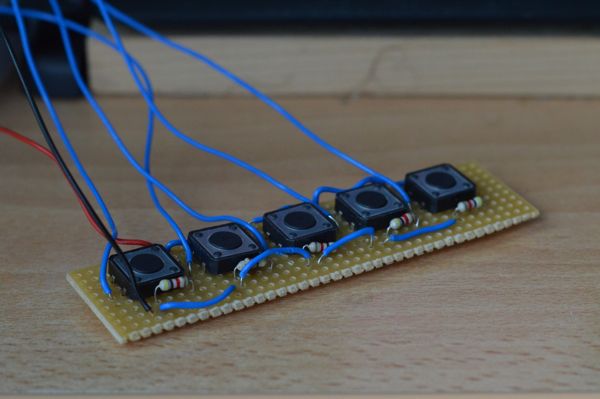
Day 23 of 30DaysOfCreativity - Buttons for the raspbery car radio
Today I soldered a board to interface the push buttons of the blaupunkt car radio that gets a new raspberry pi based brain. I tested the buttons with an arduino which worked very well. Then I tried to replace the arduino with an attiny2313 running the arduino-core firmware and the TinyWireS library, but unfortunately the setup is very instable - will have to debug this tomorrow
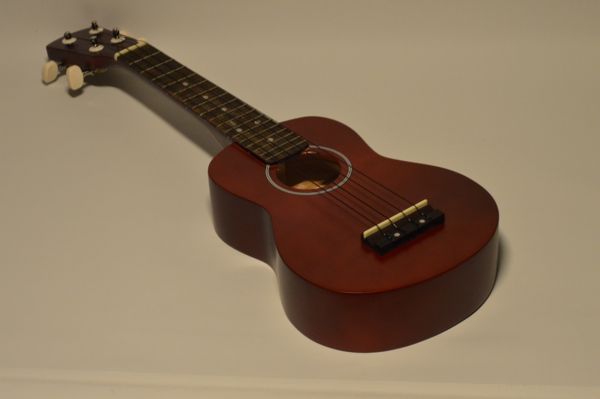
Day 22 of 30daysOfCreativity - learning to play the ukulele
My todays project for 30daysofcreativity was to learn how to play an ukulele. For the sake of all my readers hearing I did´t record any of my trials but I made a photo of my ukulele instead :-)
Day 21 of 30daysOfCreativity - 3D printed spacers
I'm currently placing a raspberry pi and an AR1010 based radio chip into the housing of a blaupunkt car radio from the 60ties for my friends VW typ 3 wilson. To mount the electronic parts I printed a bunch of spacers which I created using openscad.
you can download the openscad file here or the stl file here
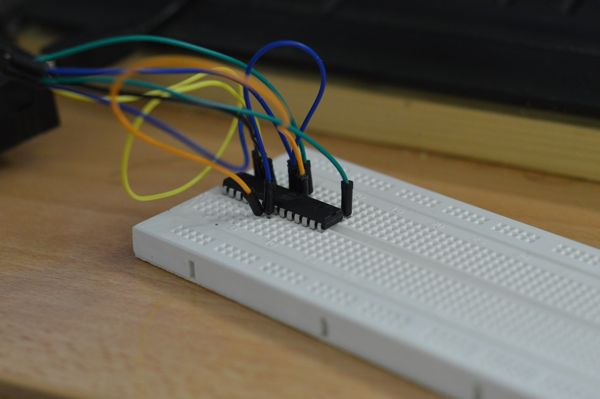
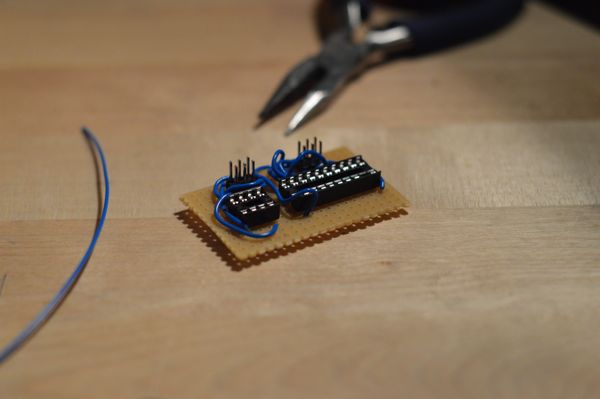
Day 20 of 30daysOfCreativity - An ATTiny programmer adapter
For my raspberry pi based car-radio project I need some attiny chips to interface the radio controlls. Today I made a simple adapter for my programmer. I soldered an 8 pin chipholder and a 20 pin chipholder to an ISP connector. Now I can programm ATTiny 45 and ATTiny 2313 chips without having to hook up the ISP adapter to my breadboard
Day 19 of 30DaysOfCreativity - RGB led for the Raspberry PI based Radio
Today I worked on the RGB led that is going to replace the small lamp that lights the display of my rapspberry pi based car radio for cheri´s VW type 3 wilson
I used an attiny 2313 to control the led. I will interface the microcontroller with I2C and connect the 5 buttons tomorrow
this is my day 19 project for 30daysOfCreativity